Get started
Collaboration
How to Use Workona
Your projects are fragmented across multiple apps, making it hard for teams to stay organized. Previously, there wasn’t a way to connect all the different parts of the project together. But with Workona’s spaces, you can do it easily and automatically — giving your team one place to find their work and stay organized as the project grows.
This guide will help you set up Workona in about a half hour.
What does a Workona space unify?
- Google Drive folders & docs: Instant access to all Google Drive folders & docs for the client or project
- Resources: Save links to content in your favorite cloud apps side-by-side with the docs in Google Drive.
- Slack channels: Your team’s Slack channels
- Task lists: Task lists connected right in the space
- Browser tabs: Organize your own tabs, which are always private
- All of the above set up automatically from a template — perfect for teams!
Ready to organize a client or project? Let’s walk through the steps below.
- Unify apps for a project in one space
- Set up projects automatically with space templates
- Organize your tabs in a space (optional)
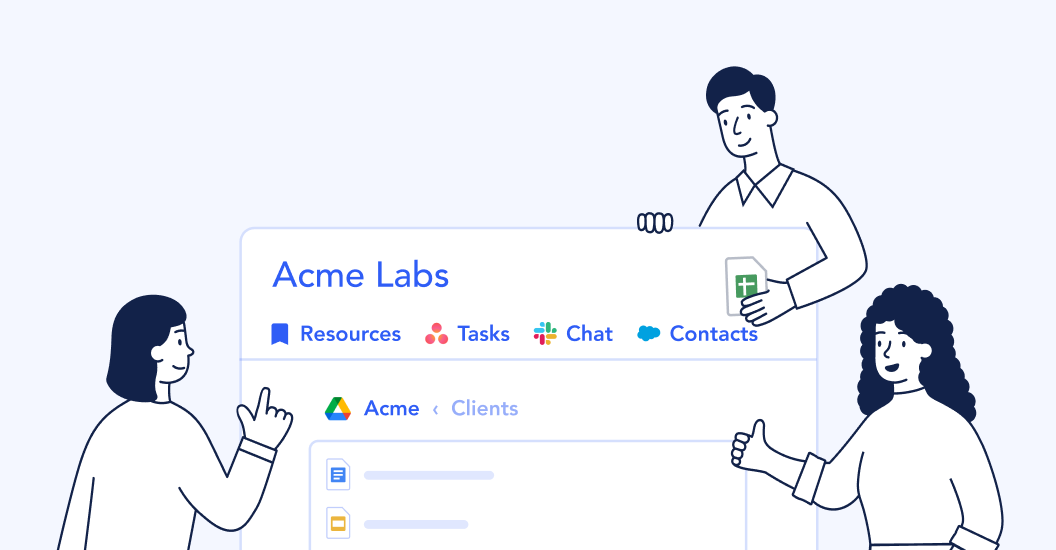
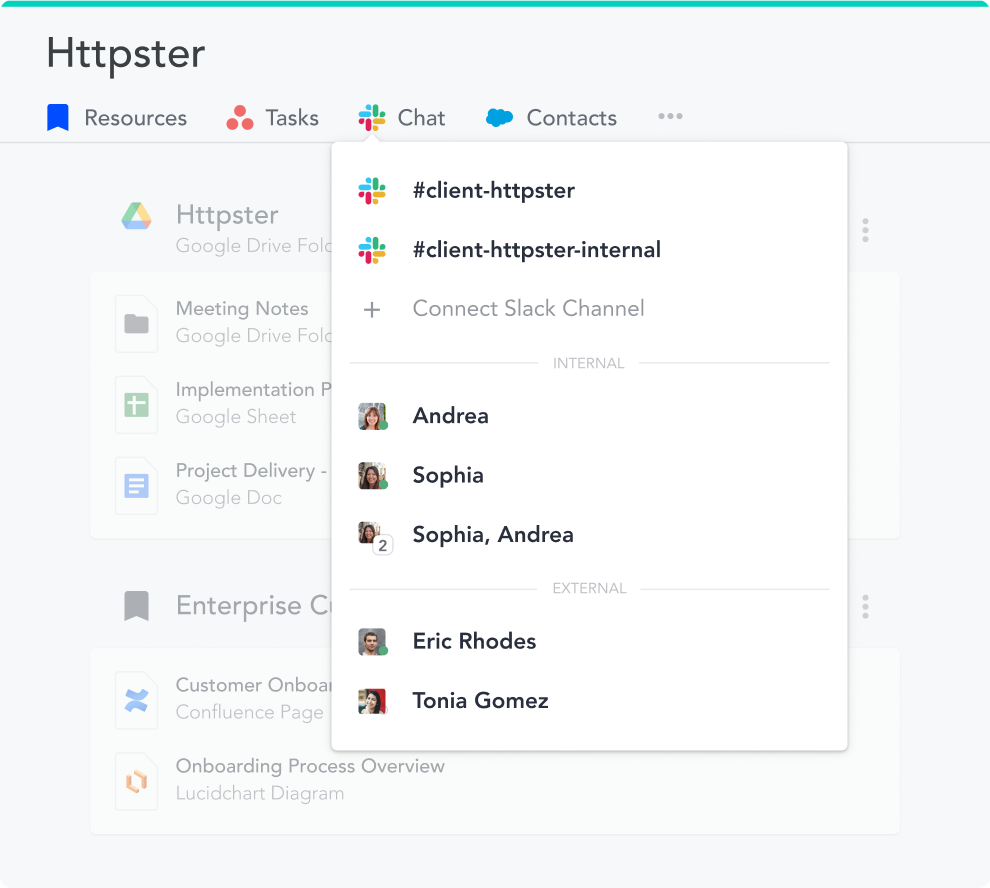
1. Unify apps in one space with spaces
Problem:
Your team is forced to jump between multiple apps for every client or project. Important details are easy to miss because they get lost in a firehose of information.
Solution:
Connect all of a project’s Google Drive folders, Slack channels, & task lists to a single unified space, so they’re a click away whenever team members are working on the project.
During a project, the most common questions are:
- “Where can I find that file?”
- “What did we decide last time we talked?”
- “What are the next steps?”
- “Can you Slack me that link again?”
Connecting Google Drive folders & docs, Slack channels, and your task lists to the project's space makes it easy to get the answers. Now they’re one click away when team members are working on the project, saving everyone the frustration of manually searching.
How to get connected spaces:
- Click the
+button in the sidebar to create a new space for each project (later, you can use a space template as a prebuilt starting point). - Connect Google Drive, so you can embed the client or project folder in a space and be auto-prompted to share resources with collaborators.
- Connect Slack to a space (i.e., internal & external channels, DMs with collaborators).
- Connect task lists from your project management app to a space (e.g., Asana, Trello, and more on the way).
- Add anything on the web with the browser extension.
2. Set up projects automatically with space templates
Problem:
Setting up a new project — all the docs, folders, channels, task lists, etc. — requires too much grunt work. Painstakingly replicating the same folder structure over and over. Finding the template doc, clicking File > Make a Copy, removing “Copy of” from the file name & appending the client/project name, moving the file to the right folder… and that’s just one doc! Plus, mistakes are common, like naming a doc or channel incorrectly, organizing it in the wrong place, or forgetting to give other team members access.
Solution:
Use space templates to auto-generate the folders, docs, Slack channels, & tasks lists for your next client or project. Your team can instantly jump into the space and access everything they need.
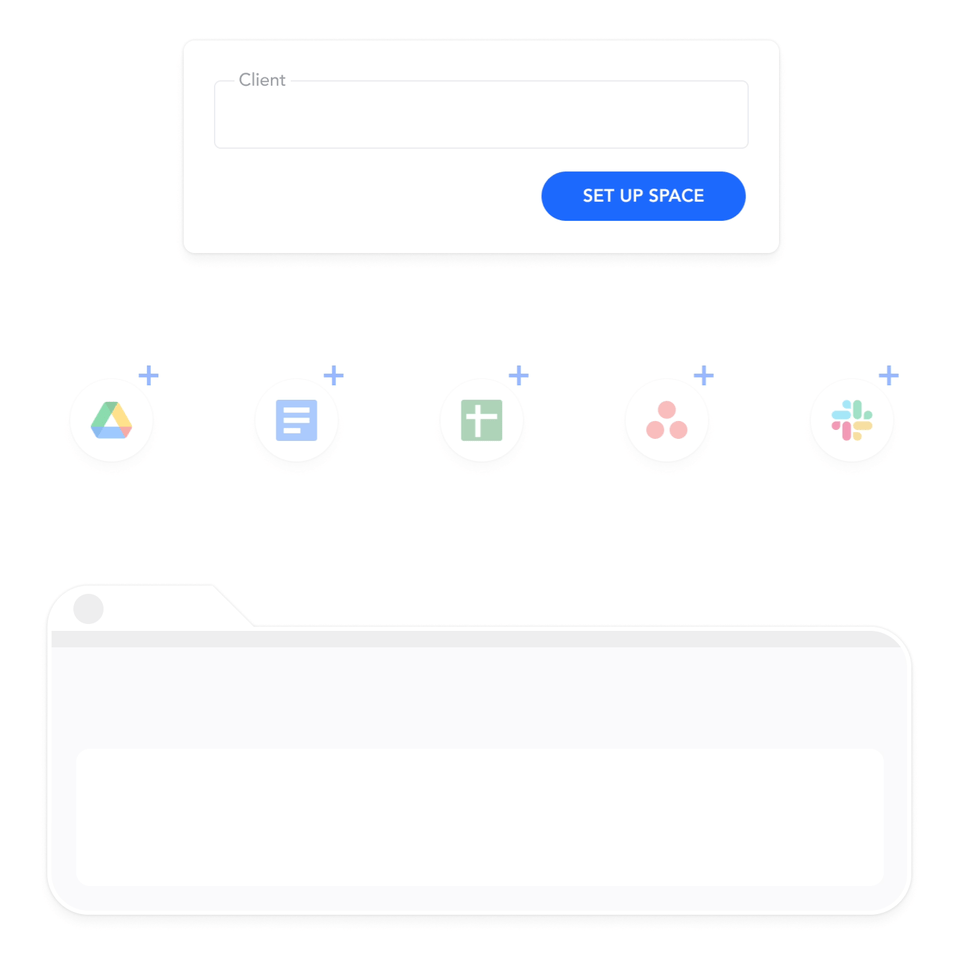
In a single click, teams can automatically create, share, and populate a space with resources from top cloud apps. Plus, customize everything in a new space with details such as client or project name.
How to get space templates:
- Click
Templatesat the bottom of the sidebar to create a space template. - Review this article to understand space template automation, including how to customize resources based on the fields you fill out (i.e. properties).
- Review this list of supported apps that you can auto-create or look up when using a space template.
3. Organize your tabs into spaces with the tab manager - optional
Problem:
There’s no good way to keep your browser tabs organized, so they pile up and create confusion throughout the workday.
Solution:
Spaces help you organize tabs by context, making it easy to focus on the project at hand. Every tab in a space is autosaved, so you never have to worry about losing work.
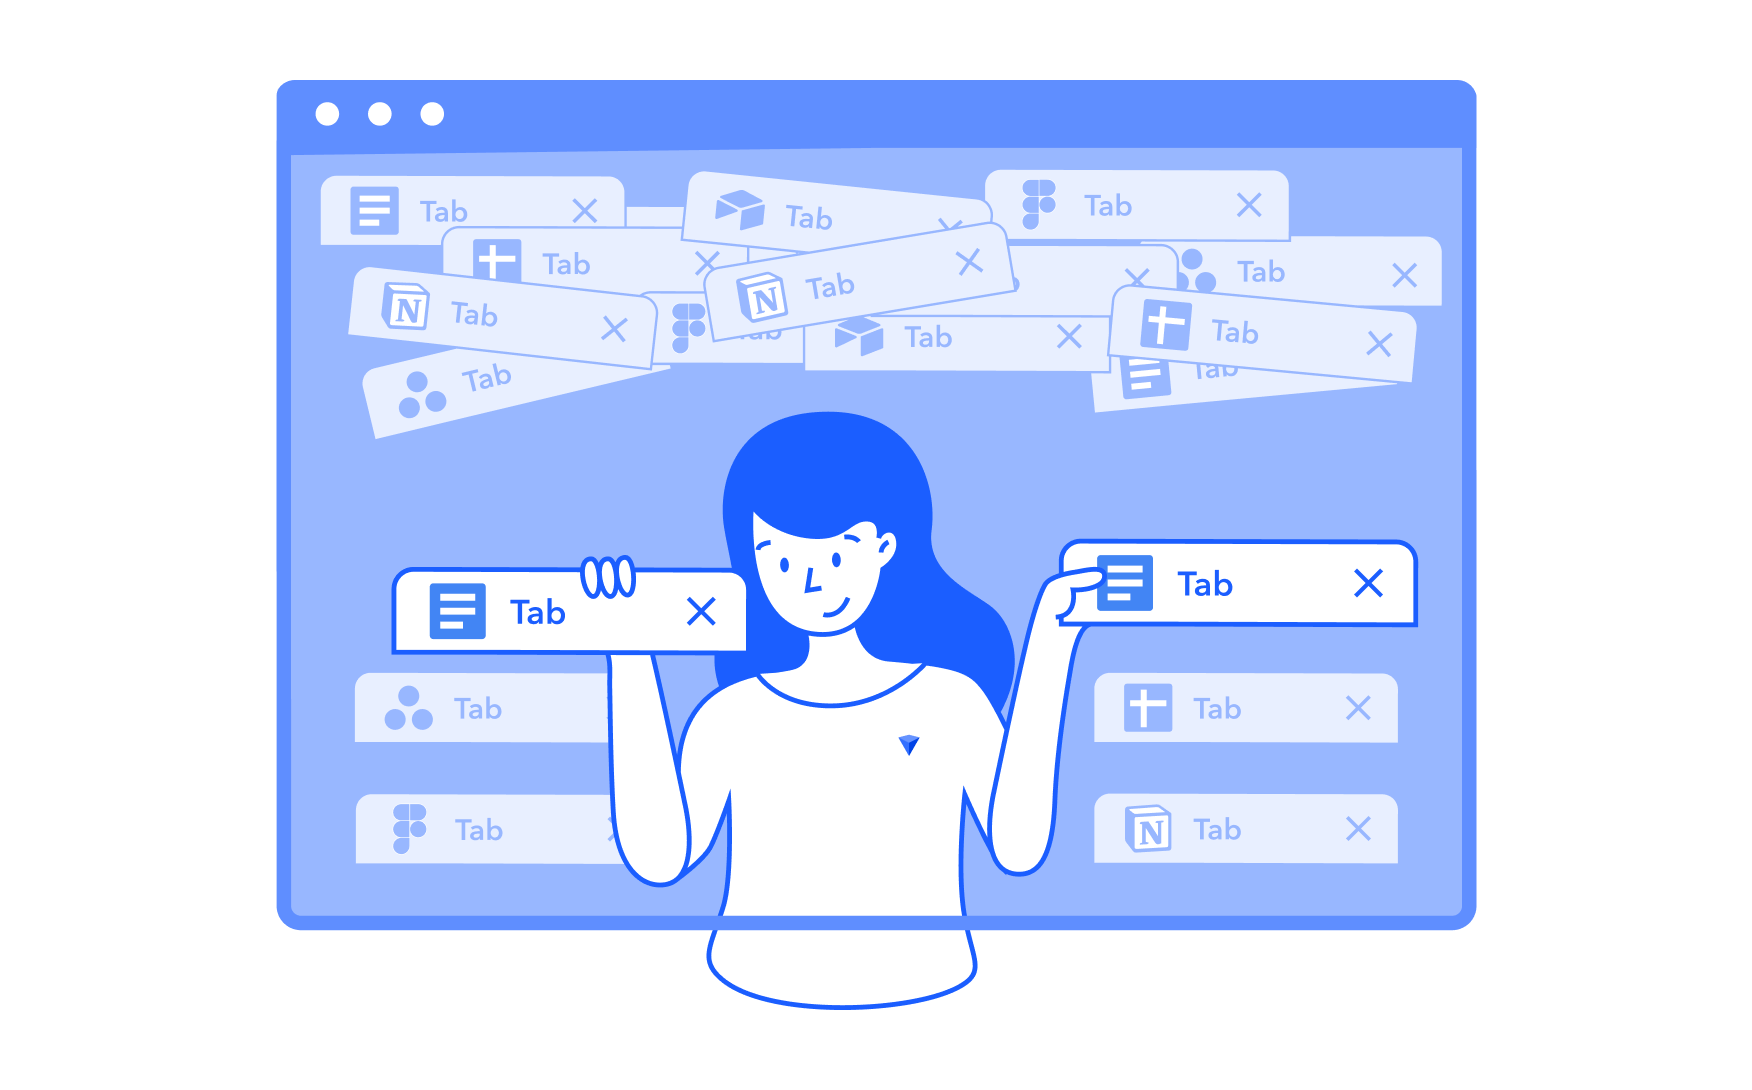
Our tab management feature is a powerful way to stay focused while you work. It's like having a clean desk for each of your projects.
How to get the tab manager:
- Add the Tab Manager extension to your browser (we support Chrome, Firefox, and Edge).
- Enable the tab management feature.
- Watch the overview video of how to use the tab manager, or review this article to learn how to manage tabs in your spaces.